How to connect Azure AD Single Sign-On to an AWS account? The second part of the series goes over the specifics, gotchas and the I-spent-so-many-hours-I-should-have-known-earlier. All AWS resources in this example will still be created manually to make things more understandable. Full automation with Terraform and Terragrunt will follow in subsequent posts of this series.
- AWS Account Structure
- Single Sign-On with SAML
- Link AWS accounts
- Usage
- Terraform
- Terragrunt
Goal
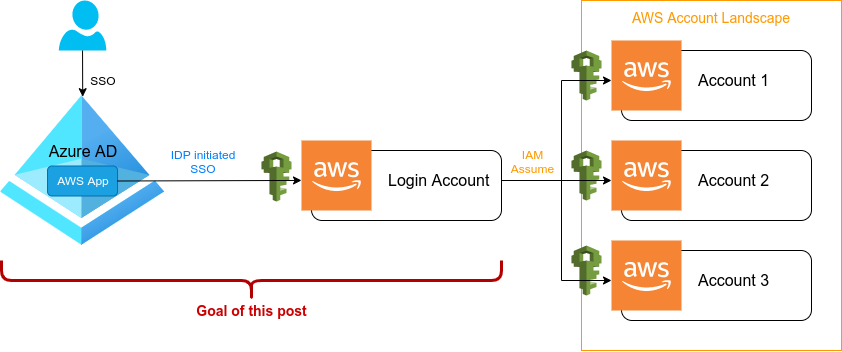
The goal of this post is to be able to log into AWS (our login account) via Azure AD Single Sign-On. Additionally we also want to be able to have different levels of permissions on AWS by using different IAM roles. Those IAM roles should have a direct one-to-one mapping to corresponding Azure AD groups. Using this role-to-group mapping approach will enable us to simply add an Azure AD user to a specific Azure AD group and thus the user will have access to AWS on a very specific IAM role.
In other words, on AWS we simply create as many different IAM roles as desired and on Azure AD side, we control what user will be able to assume what IAM role on AWS. This way round will leave Azure AD as the single point of truth when it comes to user settings as you most likely also want to attach more applications to its single sign-on.
As already said above and to make things easier, we will be using Azure AD groups mapped to AWS roles to manage access to AWS. This will allow us to adjust AWS permissions via policies attached to the specified roles. The mapping is shown in the following table.
| Azure AD group | AWS role |
|---|---|
| AWS-ADMIN | LOGIN-ADMIN |
| AWS-TEAM1-LEAD | LOGIN-TEAM1-LEAD |
| AWS-TEAM1-OPS | LOGIN-TEAM1-OPS |
| AWS-TEAM1-ENGINEER | LOGIN-TEAM1-ENGINEER |
| AWS-TEAM1-PRODUCT | LOGIN-TEAM1-PRODUCT |
| AWS-TEAM1-EXTERNAL | LOGIN-TEAM1-EXTERNAL |
| AWS-LOGIN-TEAM-CI | LOGIN-TEAM1-CI |
Once this is in place, you will simply need to assign Azure AD users to their respective groups and they will be able to assume their corresponding role on AWS.
Note: If the above listed groups/roles don’t make sense to you, refer to the first part of this series.
Table of Contents
- Prerequisits
- Configure Azure AD SSO
- Configure AWS SSO
- Add Azure AD groups
- Add AWS login roles
- Sync AWS roles to Azure AD
- Link Azure AD groups to AWS IAM roles
- Add users to AD groups
- The end
- TL;DR
- References
1. Prerequisits
Before diving into the specifics, let’s clear up a few things and get to know (at least on a basic level) how everything works.
What is SAML?
SAML (Security Assertion Markup Language) is an open source XML framework enabling the exchange of authentication. Among others, SAML is used to make assertions about properties and identity of a user and informs other users, partners or applications about this (the latter are also called service-provider in this context). For this to work, the so-called identity provider (IdP) (which stores the user information) accesses assertions in XML format.
What is SSO?
SSO (Single Sign-On) is a way for users to authenticate for multiple different services at once. In other words there will be a single login form for users to login and they can then go ahead and use all supported applications without having to log in into each one separately.
SAML and SSO
For SSO to work, there must be a mechanism to exchange information about a user and let an application know, if this user is signed in already. This is where SAML comes into play.
In our example, SAML will basically use three parties:
- Principal
- Identity Provider (IdP)
- Service Provider
The principle (or subject) is the user who wants to access an application. In our case these will be users in Azure AD that want to access AWS after sign into Azure AD.
The identity provider (IdP) is the service that stores and confirms the users identity via a login process. In our case this will be Azure AD which is telling AWS that a user has or has not been authenticated.
The service provider is the application the user wants to access. In our case this will be the AWS login account.
2. Configure Azure AD SSO
In this section we are going to add the AWS app to Azure AD and configure its SAML Singe Sign-On part. As already explained in the SAML section above, this is the identity provider side of SAML. In other words, we are going to prepare the login part, which will then be able to tell other applications (in our case AWS) that a specific user has already logged in and is allowed to assume whatever IAM role on AWS.
Add Amazon Web Services
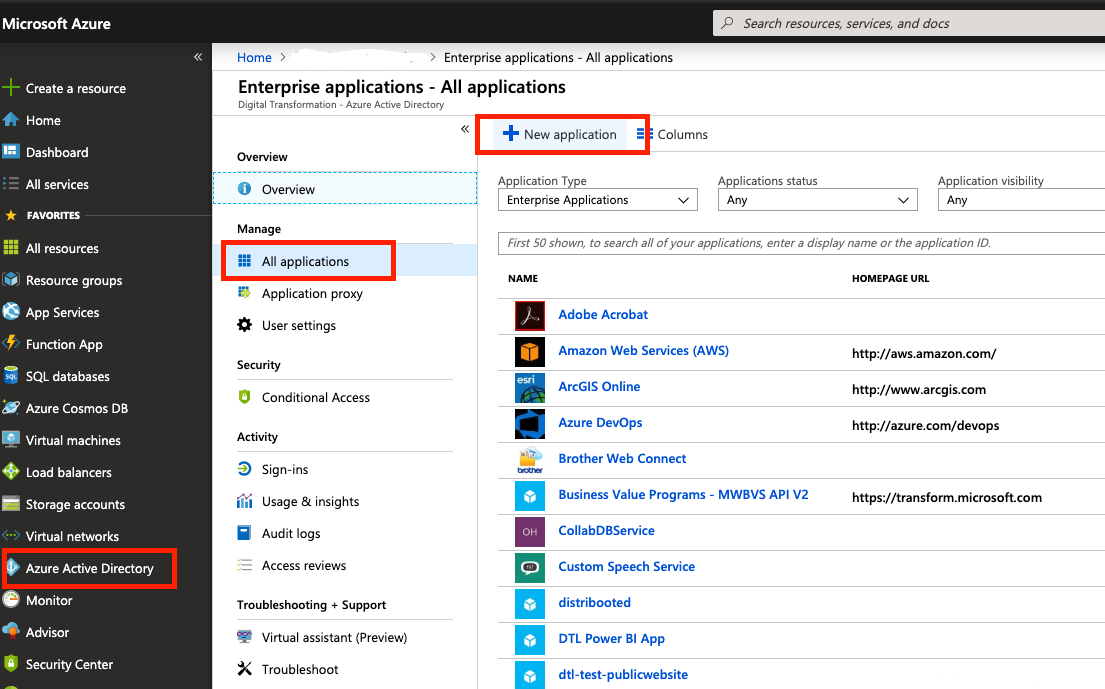
In order to add AWS as a service in Azure AD, you will need to find your way through the nested menu:
- Go to the left navigation menu
- Select Azure AD Directory Service
- Select Enterprise Applications
- Select All Applications
- Select New application
- In the searchbox type Amazon Web Services
- Finally add the app
Enable SSO
This is the step where SSO will actually be enabled
- Navigate to the Amazon Web Services (AWS) application integration page
- Find the Manage section
- Select single sign-on
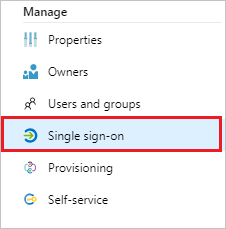
Copyright by Microsoft
- Select SAML as single sign-on method
- Afterwards click save – everything else is pre-configured just fine
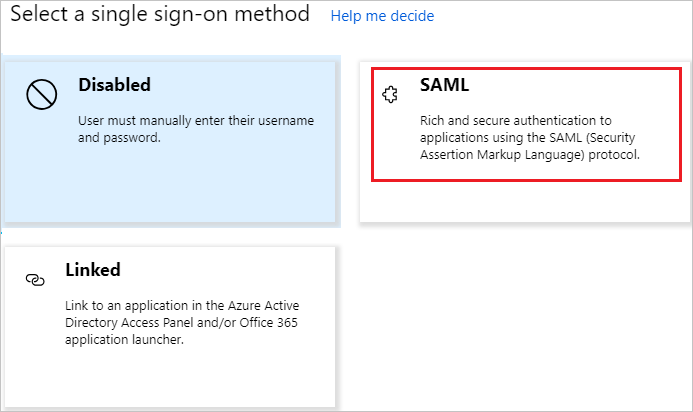
Copyright by Microsoft
Adjust SAML assertions
AWS requires SAML assertions in a specific format
- Go to the application integration page
- Select User Attributes & Claims
- Click The Edit button on the dialogue
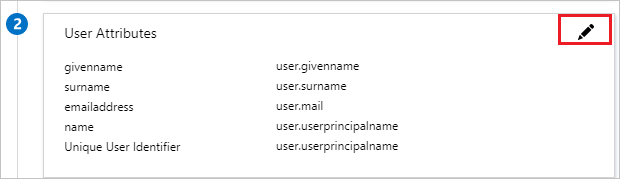
Copyright by Microsoft
- Add following AWS specific claims from User Attributes
| Name | Source Attribute | Namespace |
|---|---|---|
| RoleSessionName | user.userprincipalname | https://aws.amazon.com/SAML/Attributes |
| Role | user.assignedroles | https://aws.amazon.com/SAML/Attributes |
| SessionDuration | provide a value between 900 seconds (15 minutes) to 43200 seconds (12 hours) | https://aws.amazon.com/SAML/Attributes |
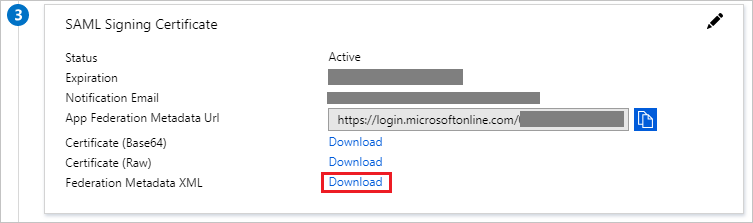
Download Federation Metadata
This file will need to be uploaded to the AWS identity provider later, so keep it safe.
- Navigate to the Set up Single Sign-On with SAML page
- Click Download and save the metadata.xml file to your local machine
Summary
Azure AD now has Single Sign-On configured via SAML for AWS. At least it will forward the request to AWS, but this alone won’t work and AWS will not allow that yet, so we must also link the opposite side to grant the Single Sign-On.
3. Configure AWS SSO
In this section we are going to make sure that the AWS login account (our SAML service provider) is accepting users logged into Azure AD and let them assume IAM roles. To make this work, we need to configure the identity provider (which is the counter part – Azure AD). Also note that once we are done with this configuration, it is only a it could work in theory, but we don’t have users yet on Azure AD, nor do we have IAM roles yet on AWS. So in other words, we are just setting up foundation.
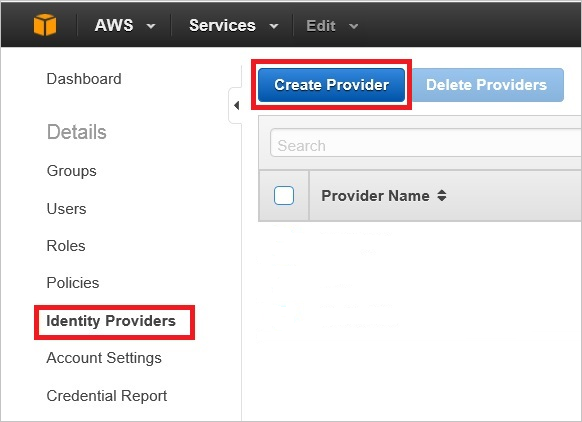
Configure SAML Identity Provider
- Log into AWS
- Choose the IAM service
- Navigate to Identity Providers
- Click on Create Provider
Copyright by Microsoft
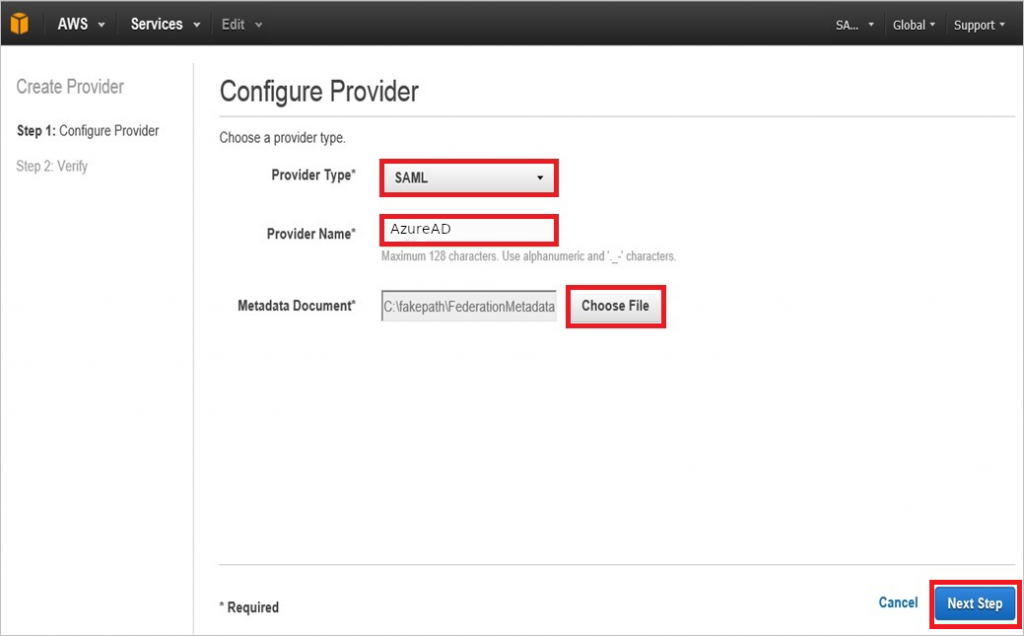
- Select SAML as your provider type
- Give a Provider Name of your choice (In our case
AzureAD) - Upload the Metadata Document you have previously downloaded from Azure AD
- Click on Next Step and then on Create on the final page
Note: Remember the provider name as it will be used later on, when creating the roles.
Copyright by Microsoft
Summary
AWS is now configured as a service provider for Single Sign-On via SAML and linked to the identity provider on Azure AD (by the metadata configuration we have provided). Once again, this will still not work yet as we have not defined what Azure AD user/group is allowed to assume into what AWS role. In fact we do not have any roles created on AWS at this stage.
4. Add Azure AD groups
Yes we are lazy admins! We do not want to make settings for each user separetely, but rather have groups that control the users and of course we also only want to link those groups later to their corresponding IAM roles. So having our attitute towards work moved out of the way for now, let’s make up our mind for groups. Don’t spend too much time here on naming, I got you covered already. Remember the group-to-role mapping table at the very top? And also why we chose to name them like so?
While you jump back to the top and eventually even read the first part on this series again, I will go ahead and list the Azure AD groups that we are going to create:
- AWS-ADMIN
- AWS-TEAM1-LEAD
- AWS-TEAM1-OPS
- AWS-TEAM1-ENGINEER
- AWS-TEAM1-PRODUCT
- AWS-TEAM1-EXTERNAL
- AWS-LOGIN-TEAM-CI
Note: Keep in mind that the group-to-role mapping is a one-to-one mapping! So choose names that reflect this somehow – your colleagues will be thankful. You will still be able to add Azure AD users to multiple Azure AD groups though, allowing them to assume different login roles on AWS.
Add groups
- Search for and select Azure Active Directory
- On the Active Directory page, select Groups
- Click on New group
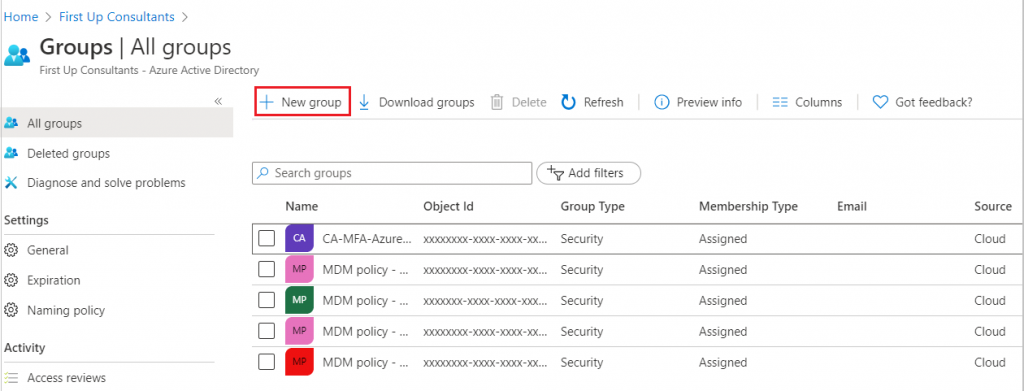
Copyright by Microsoft
- Fill in group name (in our case
AWS-ADMIN) - Fill in other information
- Click on Create group
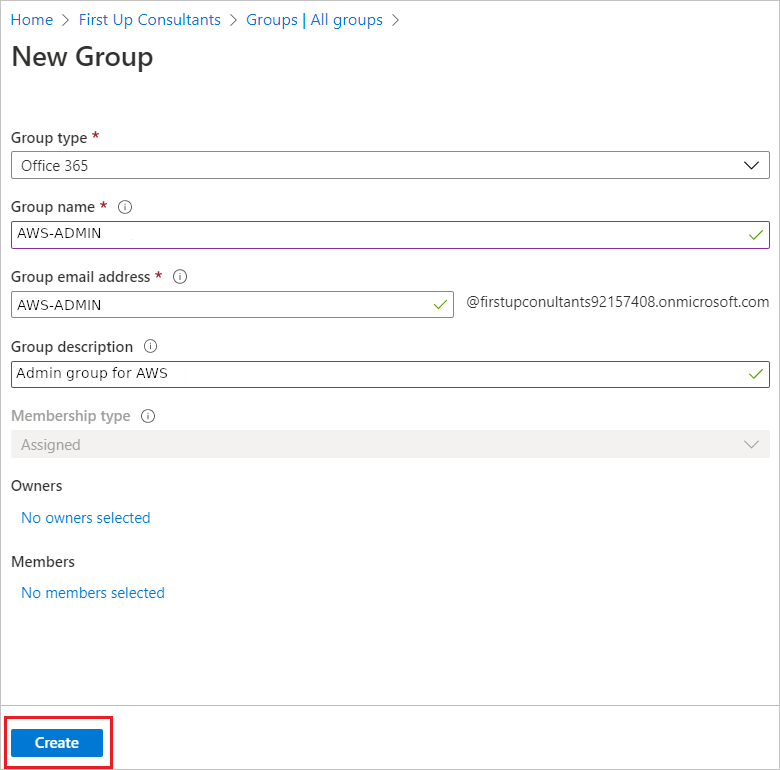
Copyright by Microsoft
Now our AWS-ADMIN group has been created. Rinse and repeat for the remaining groups with the exact same settings (except name, email and description) and you’re done.
Summary
We now have created all required groups in Azure AD that will later be linked to their corresponding AWS roles. (I hope you did not miss the “rinse and repeat…” part).
5. Add AWS login roles
Back on AWS, and yes we will keep switching back and forth between Azure AD and AWS.
We are going to create IAM roles which users who have logged in into Azure AD can assume (much later in this post). These roles will be the exact counterpart of the above created Azure AD groups, so keep the naming consistent. Additionally to note, those roles will not have any permissions for AWS except for sts:AssumeRole. This is on purpose and will allow for our concept of separation of concerns. (refer to part one of this series to read up on the details or simply trust a random guy on the internet on this).
I have already chosen the naming for you:
- LOGIN-ADMIN
- LOGIN-TEAM1-LEAD
- LOGIN-TEAM1-OPS
- LOGIN-TEAM1-ENGINEER
- AWS-TEAM1-PRODUCT
- AWS-TEAM1-EXTERNAL
- AWS-LOGIN-TEAM-CI
Create Assume policy
Before creating any roles, we first have to create a default policy for all login roles. The only permission that policy will grant is sts:AssumeRole, which means that whatever resource (role, user, group, etc) has attached this policy is only allowed to assume another IAM role. This will allow logged in users to further assume into roles defined in the same or other AWS accounts. We will cover the specifics of that a bit later though.
- Head over to the AWS IAM service
- Navigate to Policies
- Click on Create policy
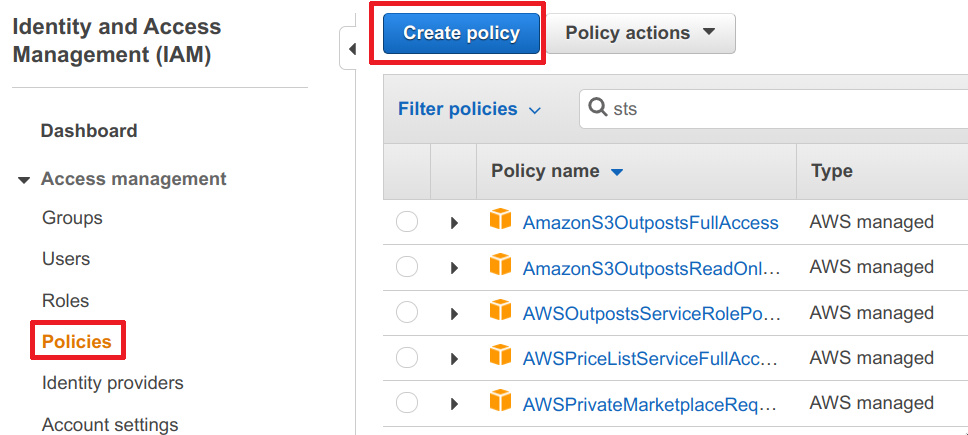
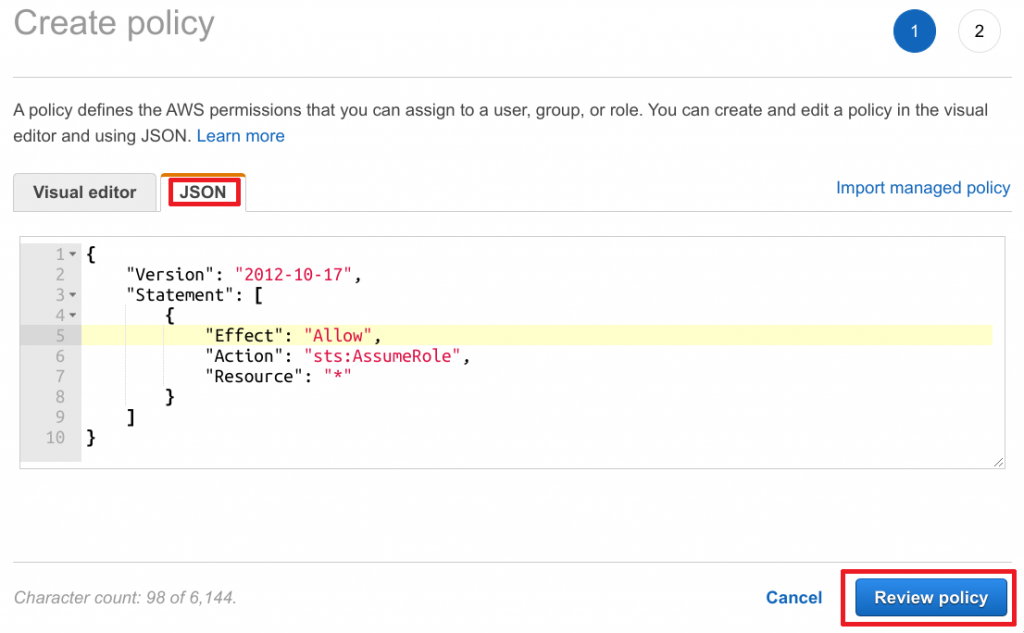
- Switch from Visual Editor to JSON
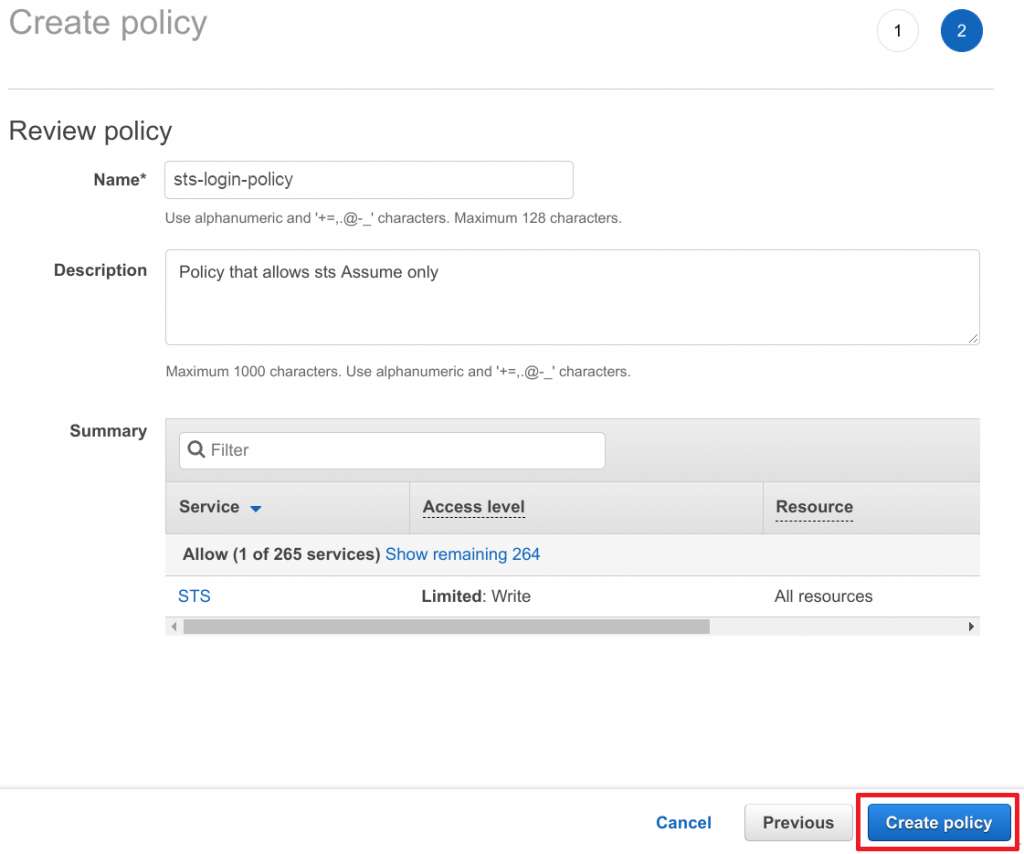
- Paste the following policy into the text field and click on Review policy
{
    "Version": "2012-10-17",
    "Statement": [
        {
            "Effect": "Allow",
            "Action": "sts:AssumeRole",
            "Resource": "*"
        }
    ]
}
- Enter a Name and Description
- Click on Create policy
Create IAM login roles
Required policy is in place, so we can finally begin to create our login roles.
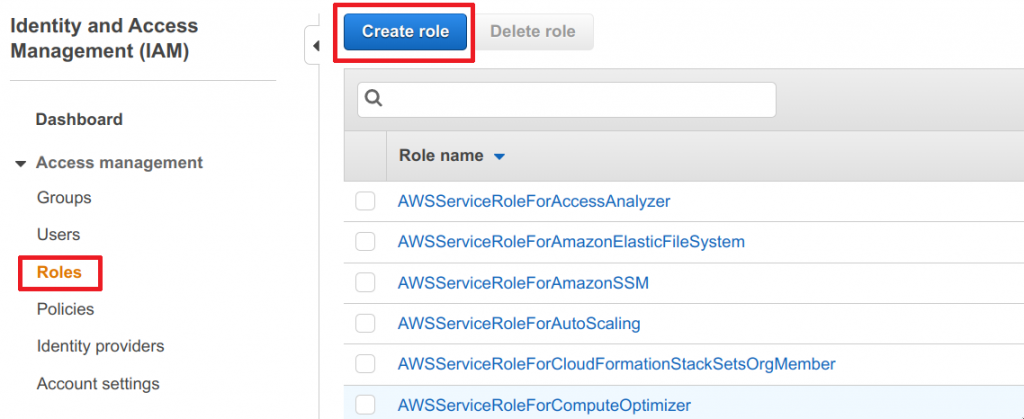
- Head over to the AWS IAM service
- Navigate to Roles
- Click on Create role
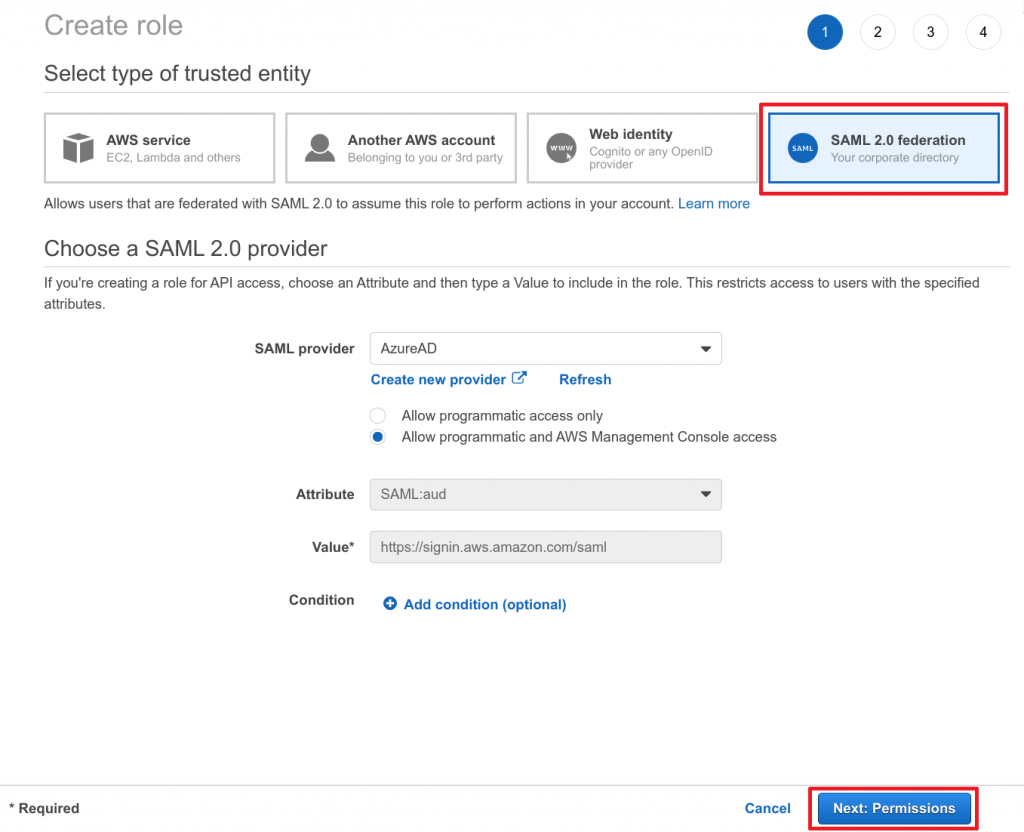
- Select SAML 2.0 federation for trusted entity type
- Choose the previously created SAML provider
- Select “Allow programatic and AWS Management Console access”
- Ensure Attribute and Value match those of the screenshot below and click Next: Permissions to continue
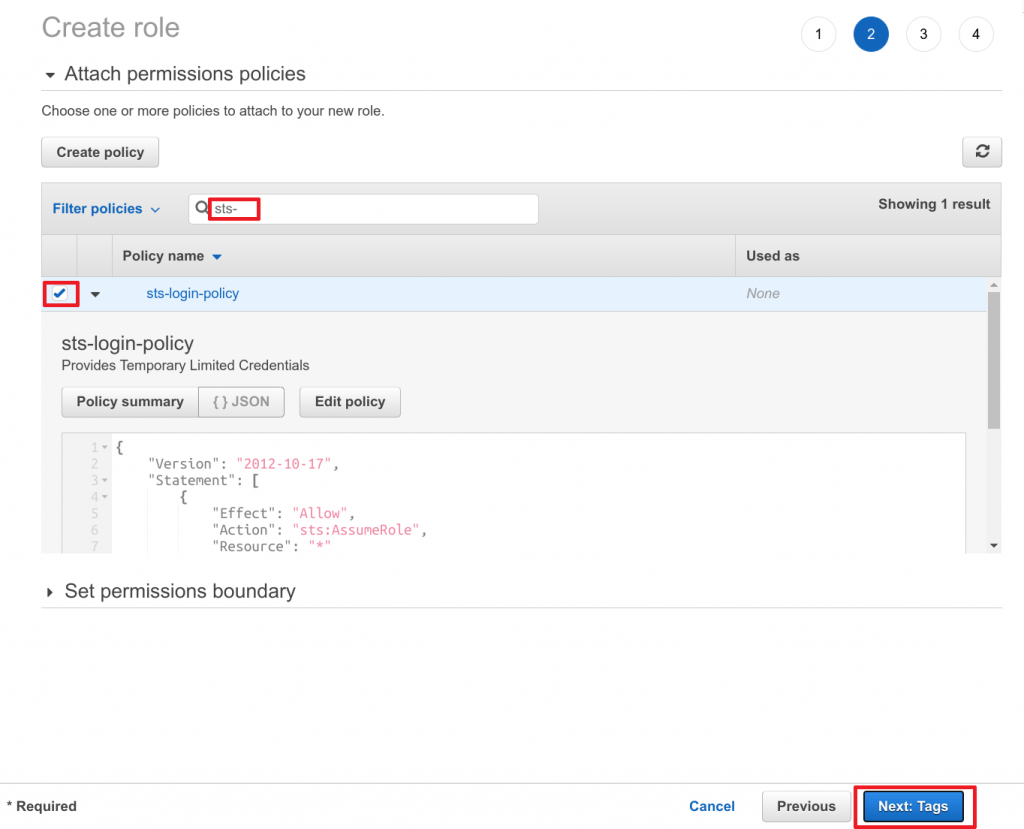
- Search for
sts-login-policy(our previously created IAM policy) - Select the policy by marking the checkbox
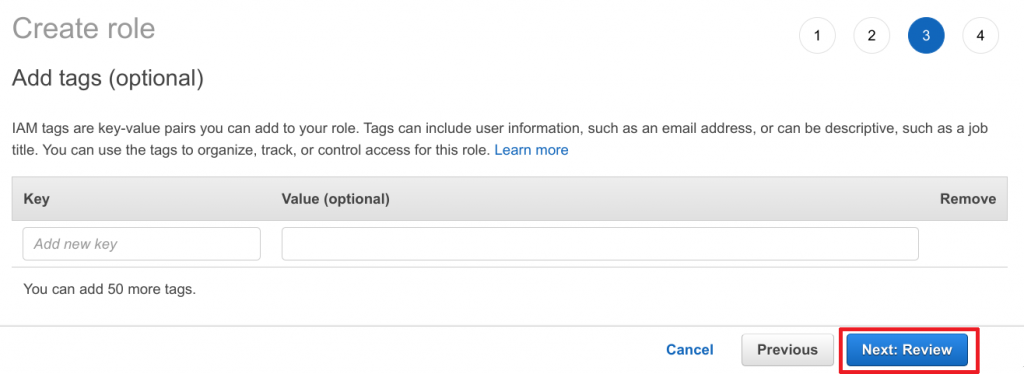
- Click on Next: Tags to continue
- Add any tags required and then click Next: Review to continue
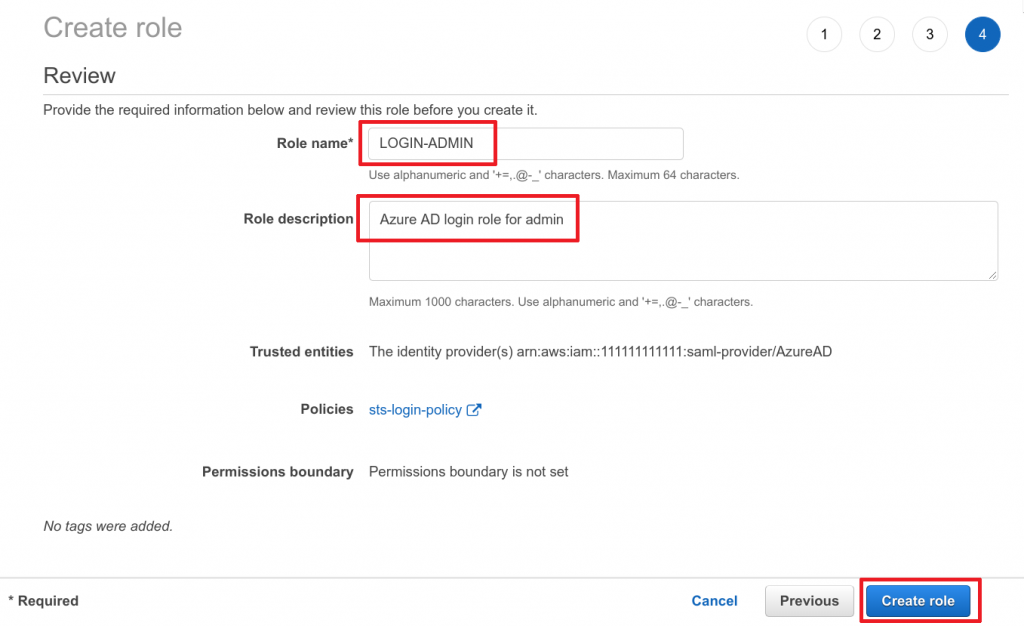
- Choose the Role name for this role (in our case
LOGIN-ADMIN) - Choose a Description (optional)
- Click on Create role
Now our LOGIN-ADMIN role has been created. Rinse and repeat for the remaining roles with the exact same settings (except name and description) and you’re done
Explain IAM login roles
OK, let’s step back a bit and get some details about the above created IAM roles.
Trusted Entity?
This one tells the IAM role to trust whatever trusted entity we have chosen (in our case SAML) and allow this entity (whatever/whoever authorizes through the SAML provider) to assume this IAM role. We have chosen the SAML provider previously configured, which allows some entity from Azure AD to assume that role.
In other words: If the Azure AD side tells AWS “this Azure AD user can use this AWS role”, AWS will grant it access.
Don’t worry too much about the Azure AD side here, we still have to enable users in Azure AD to allow them to only access specific groups on AWS. (AWS only provides the roles, Azure AD will actually decide, what user is then allowed to access what role on AWS).
Policy
The policy attached to a role determines what permission that role has on AWS. In our case we’ve only granted sts:AssumeRole which means that this role is allowed to assume another role. Keep in mind that the other role to be assumed, must also explicitly allow to be assumed, so we’re still on the safe side and haven’t actually granted anything yet that works.
Summary
We now have IAM roles on AWS that can be assumed from Azure AD. Those roles are also only allowed to asume other roles. But, Azure AD has not allowed anyone yet to assume those roles. And no other IAM roles actually exist yet, that are allowed to be assumed by the above created roles.
In other words: we have laid another foundation, but nothing works yet :-)
6. Sync AWS roles to Azure AD
At some point in this post we will need to link Azure AD groups with their respective IAM roles from AWS. This could be done by going to AWS, noting down their role ARNs, switching back to Azure AD and adding those ARNs to the groups. You see were I’m going with this? So in this section we will add some configuration which makes all AWS IAM roles magically appear on Azure AD. The setup we’re going for is called automated Azure AD provisioning if you might ask.
For this to work we need an IAM user on AWS, which is allowed to read out available IAM roles. We then need to add the credentials of this IAM user to Azure AD. So let’s go ahead and quickly create an IAM user, that should be about it.
Azure AD IAM User
Yeah actually that’s not quite it, we first have to deal with policies.
Create IAM policy
- Head over to the AWS IAM service
- Navigate to Policies
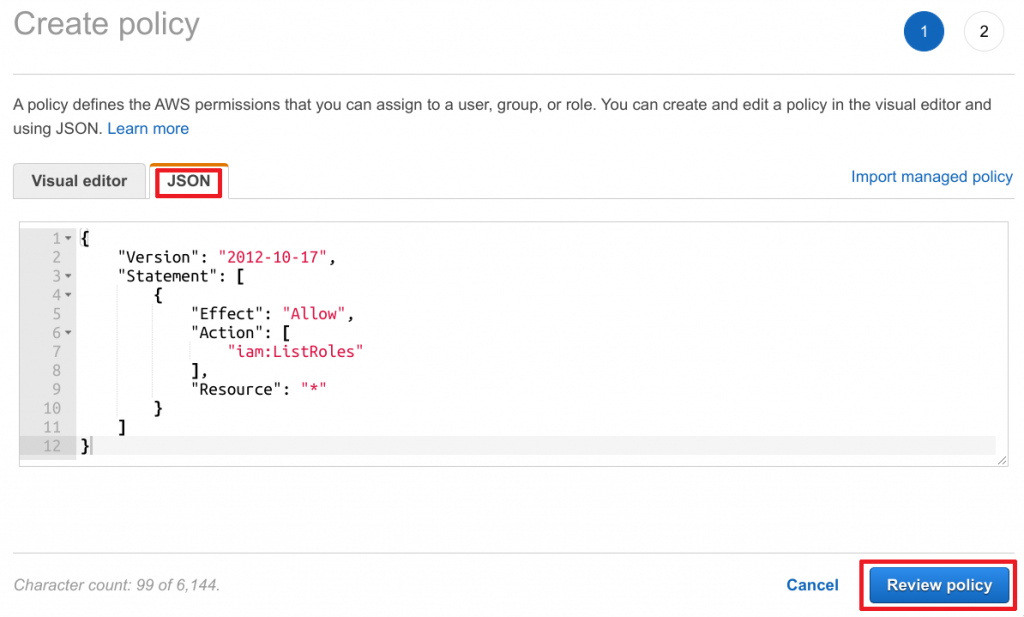
- Click on Create policy
- Switch from Visual Editor to JSON
- Paste the following policy into the text field and click on Review policy
{
    "Version": "2012-10-17",
    "Statement": [
        {
            "Effect": "Allow",
            "Action": [
                "iam:ListRoles"
            ],
            "Resource": "*"
        }
    ]
}
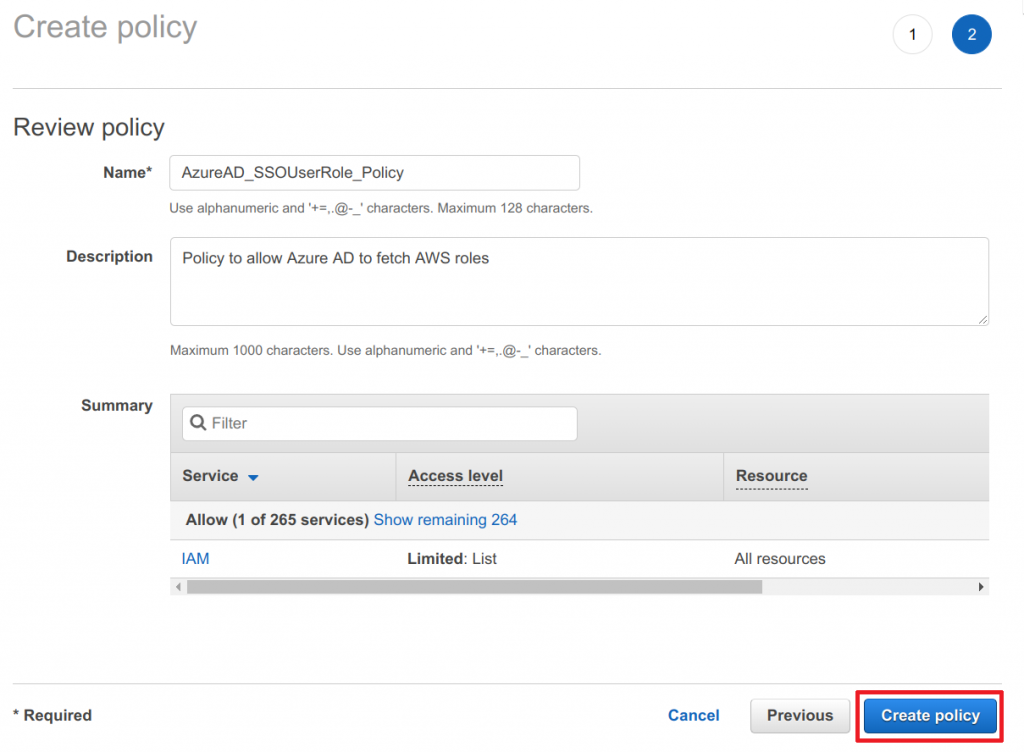
- Enter a Name and Description
- Click on Create policy
Create IAM user
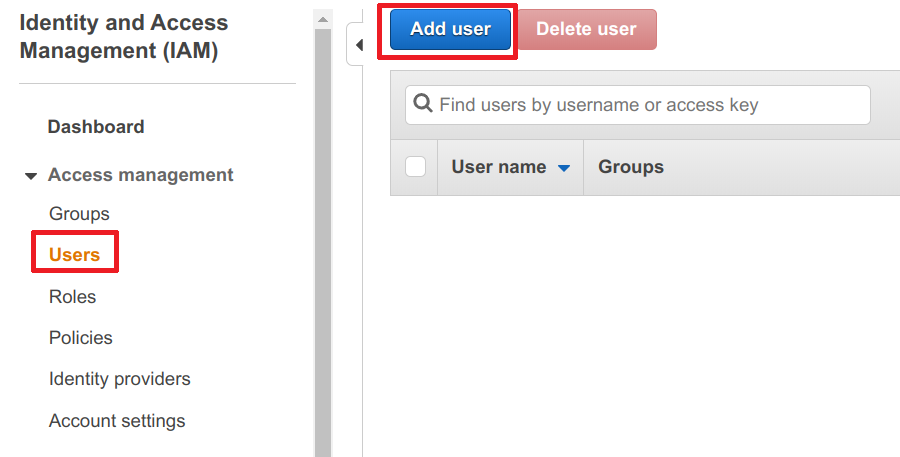
- Head over to the AWS IAM service
- Navigate to Policies
- Click on Add user
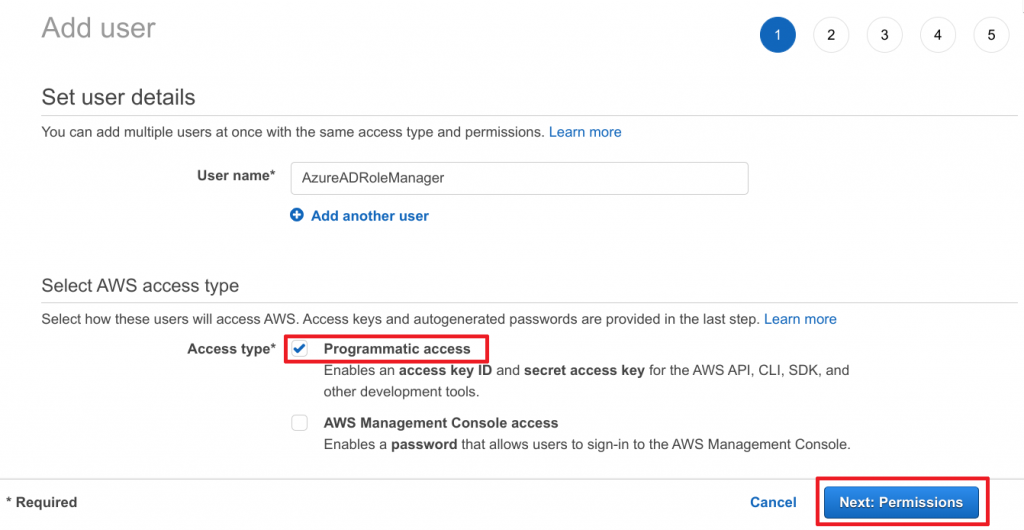
- Choose a meaning fule name
- Only give it programmatic access
- Click on Next: Permission
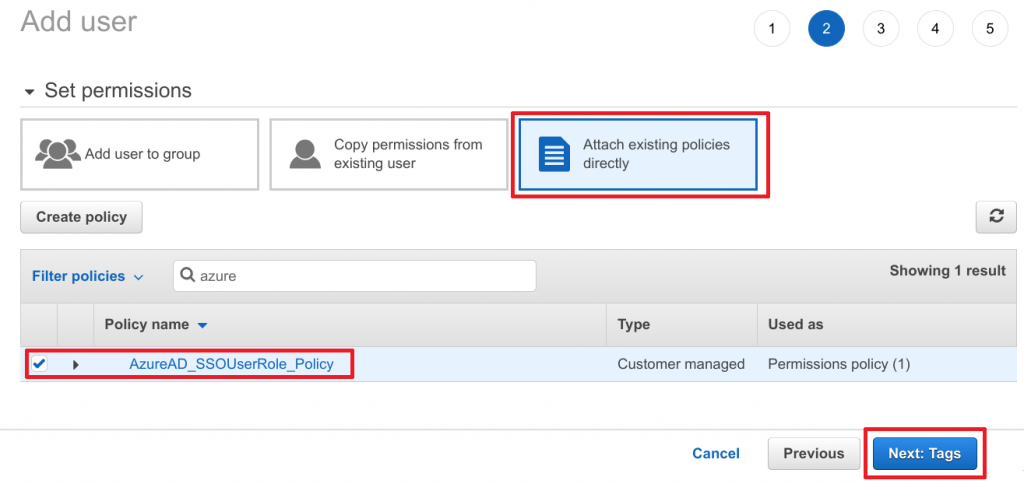
- Select Attach existing policies directly
- Search for previously created
AzureAD_SSOUserRole_Policy - Select policy by marking the checkbox
- Click on Next: Tags to continue
- Add any tags required and then click Next: Review to continue
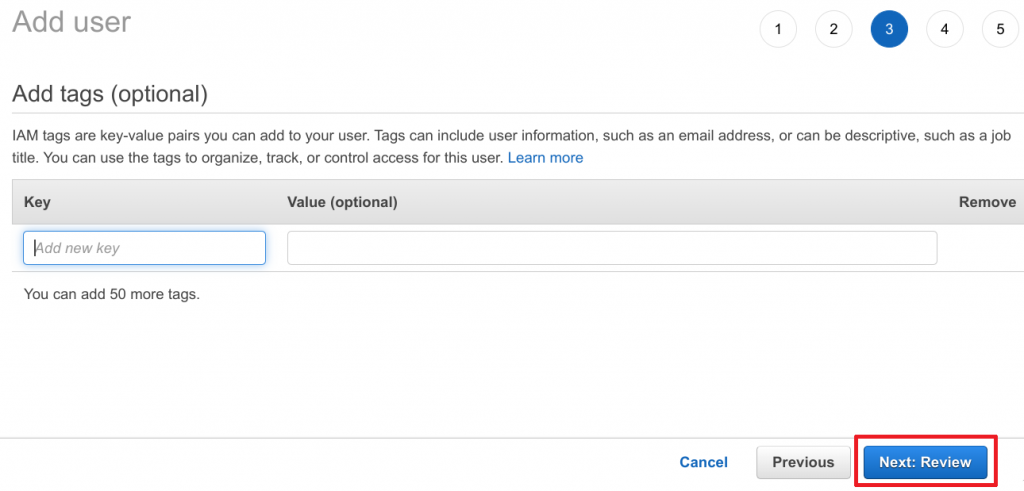
- Click on Create user to continue
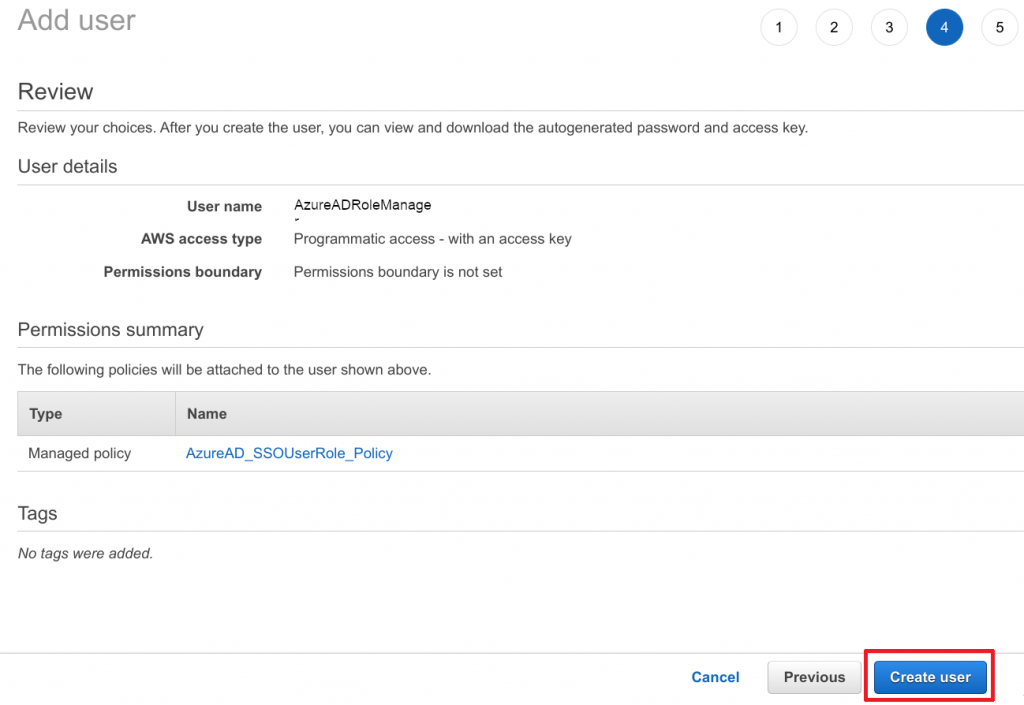
Important: Now note done the AWS access and secret key for this IAM user. The secret will only be displayed once. You will need this data for Azure AD.
Configure Azure AD provisioning
We are almost done. Now head back to Azure AD.
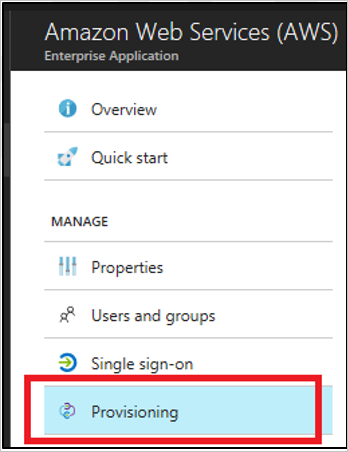
- Navigate to the Amazon Web Services (AWS) application integration page
- Click on the Provisioning section
Copyright by Microsoft
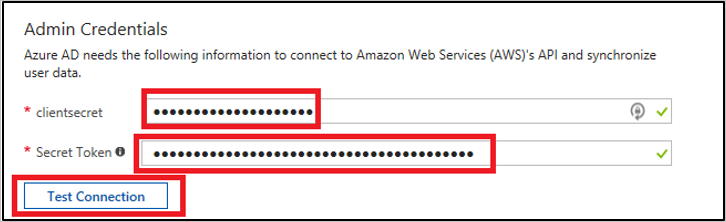
- Enter the previously noted down AWS Access Key and Secret into the clientsecret and Secret Token field respectively.
- Click on Test Connection to ensure everything works.
Copyright by Microsoft
- Then set the Provisioning Status to On and save it
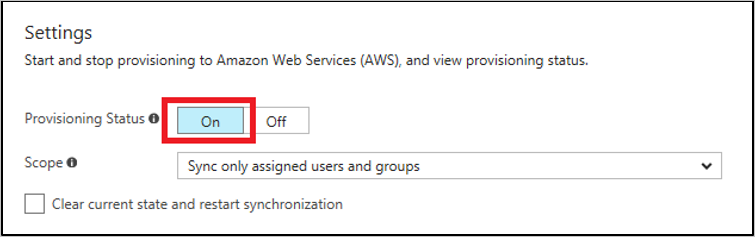
Note: The provisioning service will import roles only from AWS to Azure AD. The service does not provision users and groups from Azure AD to AWS.
The initial sync may take up to 40 minutes.
Summary
We just did some black magic that whenever you create an IAM role, it will be synced to Azure AD automaticaly and is available there… somewhere.
7. Link Azure AD groups to AWS IAM roles
Finally, what we’ve been waiting for! Let’s glue it all together. We already have groups in Azure AD and roles in AWS which are synced to Azure AD and exist there somewhere. All that is left is the missing link.
- Navigate to the Amazon Web Services (AWS) application integration page
- Click on the Users and Groups tab on the top
- Click on Add Assignment
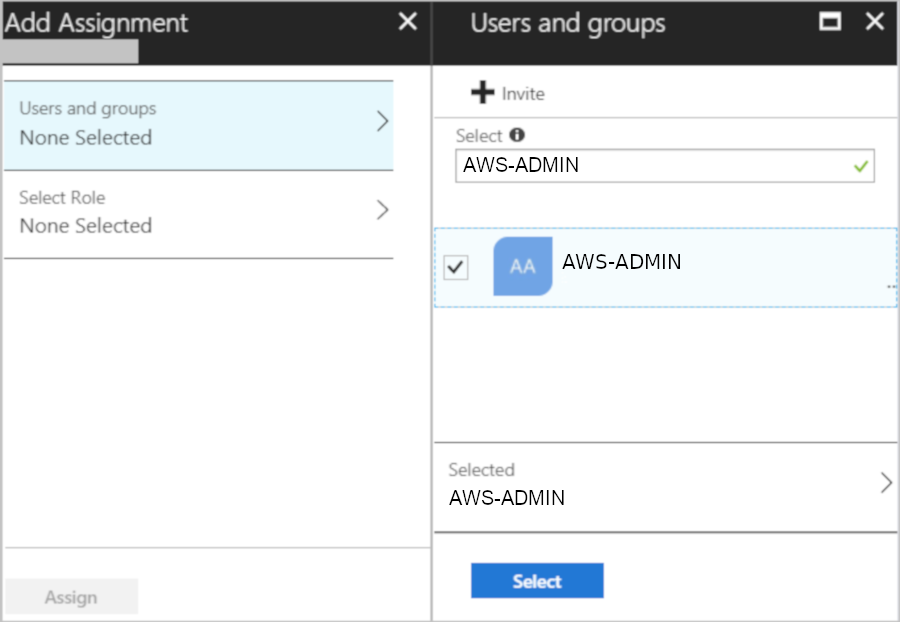
Copyright by Microsoft
- Select the AWS role for that group

Copyright by Microsoft
Now our AWS-ADMIN Azure AD group has been linked to the LOGIN-ADMIN role in AWS. Rinse and repeat for the remaining groups/roles and you’re done.
8. Add users to AD groups
OK, actually this is the final step. Now our laziness can at last be rewarded. In this section we can simply mouse-click AD users into their AD groups. By adding a user to a group the user will automatically have single sign-on available for AWS and will end up in whatever IAM role was assigned to that group after he/she/it logged in. Burn this procedure into your head, from now on you will spend your time here for loving on- and offboardings.
Also very worth noting: Remember when I wrote that role-to-group relation is a one-to-one mapping? This part is a one-to-many mapping! You can go crazy here and give users access to multiple AWS IAM roles by adding them to multiple AD groups.
Add users
- Search for and select Azure Active Directory
- On the Active Directory page, select Groups
- Edit the
AWS-ADMINgroup - Click on Members in the left navigation
- Click on *Add Members**
- Start searching for your members and add them
- Once you are done, click on Select to save
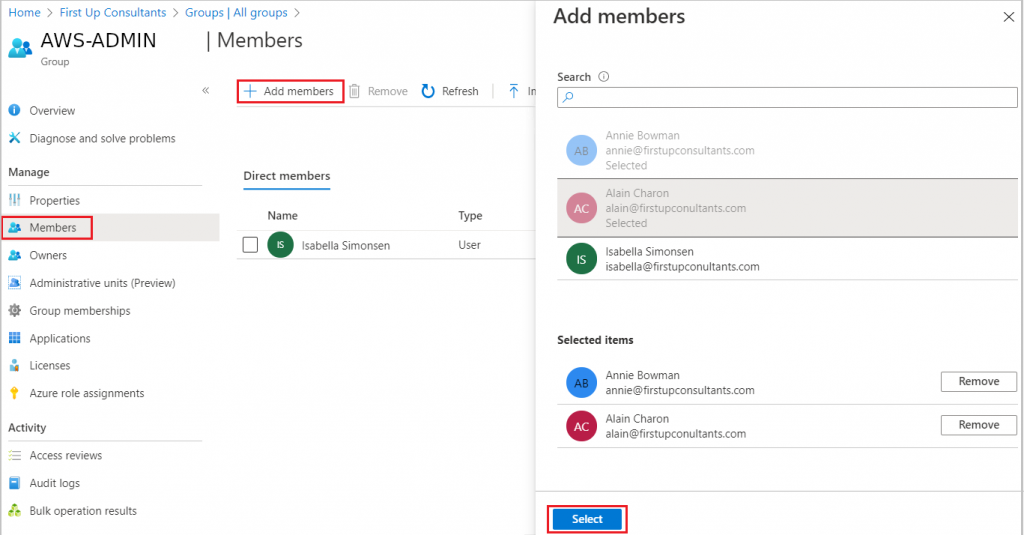
Copyright by Microsoft
Important
I spent a huge amount of time trying to figure out why Azure AD users of a specific group were not allowed to assume an AWS role after login. The following did the trick for me.
Make sure that all users in Azure AD have filled out First name, Last name, and Display name values in their user properties. Otherwise, automatic provisioning won’t work with Azure AD.
https://docs.aws.amazon.com/singlesignon/latest/userguide/azure-ad-idp.html
9. The end
You did it! At least if you had actually read this blog article instead of just jumping straight to the bottom. So let’s go ahead and see how everything looks and feels:
Go to your Azure AD login page and just log in. You will then be presented with a multitude of application to choose from. One of them being your freshly added AWS app.
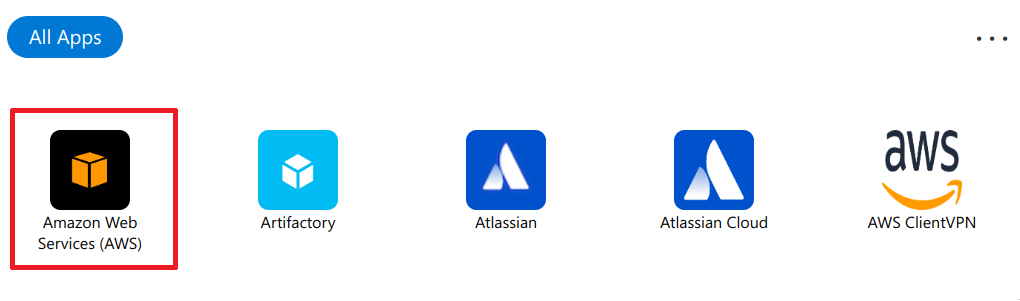
Click on AWS and you will end up being logged into AWS.
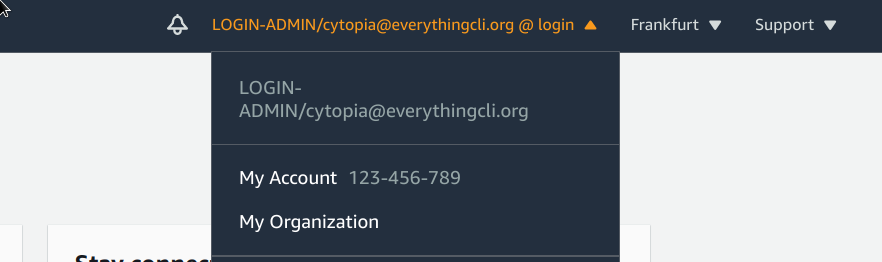
And here goes nothing :-)
Wherever you will click in AWS, you will always get an “You don’t have permission to…”.
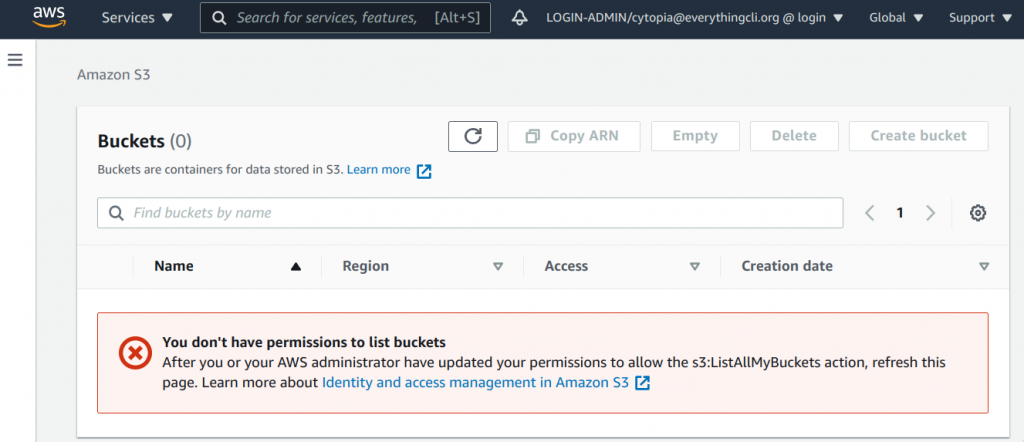
To sum it up and as the headline said, the blog is finished. Oh boy, you went through all this complicated trouble of setting up so much, but yet, you can’t do anything on AWS after login…
“But why???” you might ask
Separation of concerns! The next post in this series will magically link it all together – it’s worth it.
10. TL;DR

11. References
- https://docs.microsoft.com/en-us/azure/active-directory/saas-apps/amazon-web-service-tutorial
- https://aws.amazon.com/blogs/aws/the-next-evolution-in-aws-single-sign-on/
.
Pingback: AWS Single Sign-On with AzureAD: AWS Account Structure - Everything CLI
Pingback: AWS Single Sign-On with AzureAD: Link AWS Accounts - Everything CLI
Pingback: http aws azure login com Account Portal Instructions Help Guide - trustne.com